[Note - this feature is only available in Pro subscription]
The Graphical Takeoff Tool (GTO) is used to speed up the takeoff process, instead of manually measuring a plan, we can upload a PDF of image and then trace over the top of it using our Inventory or Recipes to find exact quantities and send them across to the Estimate, saving you from manually inputting info as you go.
First off open up your Estimate, and navigate to a Cost Centre to work in, for this example I'm going to do a Floor Covering takeoff using my Carpet inventory, you can do almost anything with GTO but for this example we'll do something very simple.
In the above screenshot I've selected the "Floor Finishes" Cost Centre, then I've added in the "Carpet supplied and installed" inventory item.
This is where you would usually just adjust the quantities to suit the amount you require from your manual measurements, but instead we are going to click on the "Manage Takeoffs" from the main "Estimate" menu.

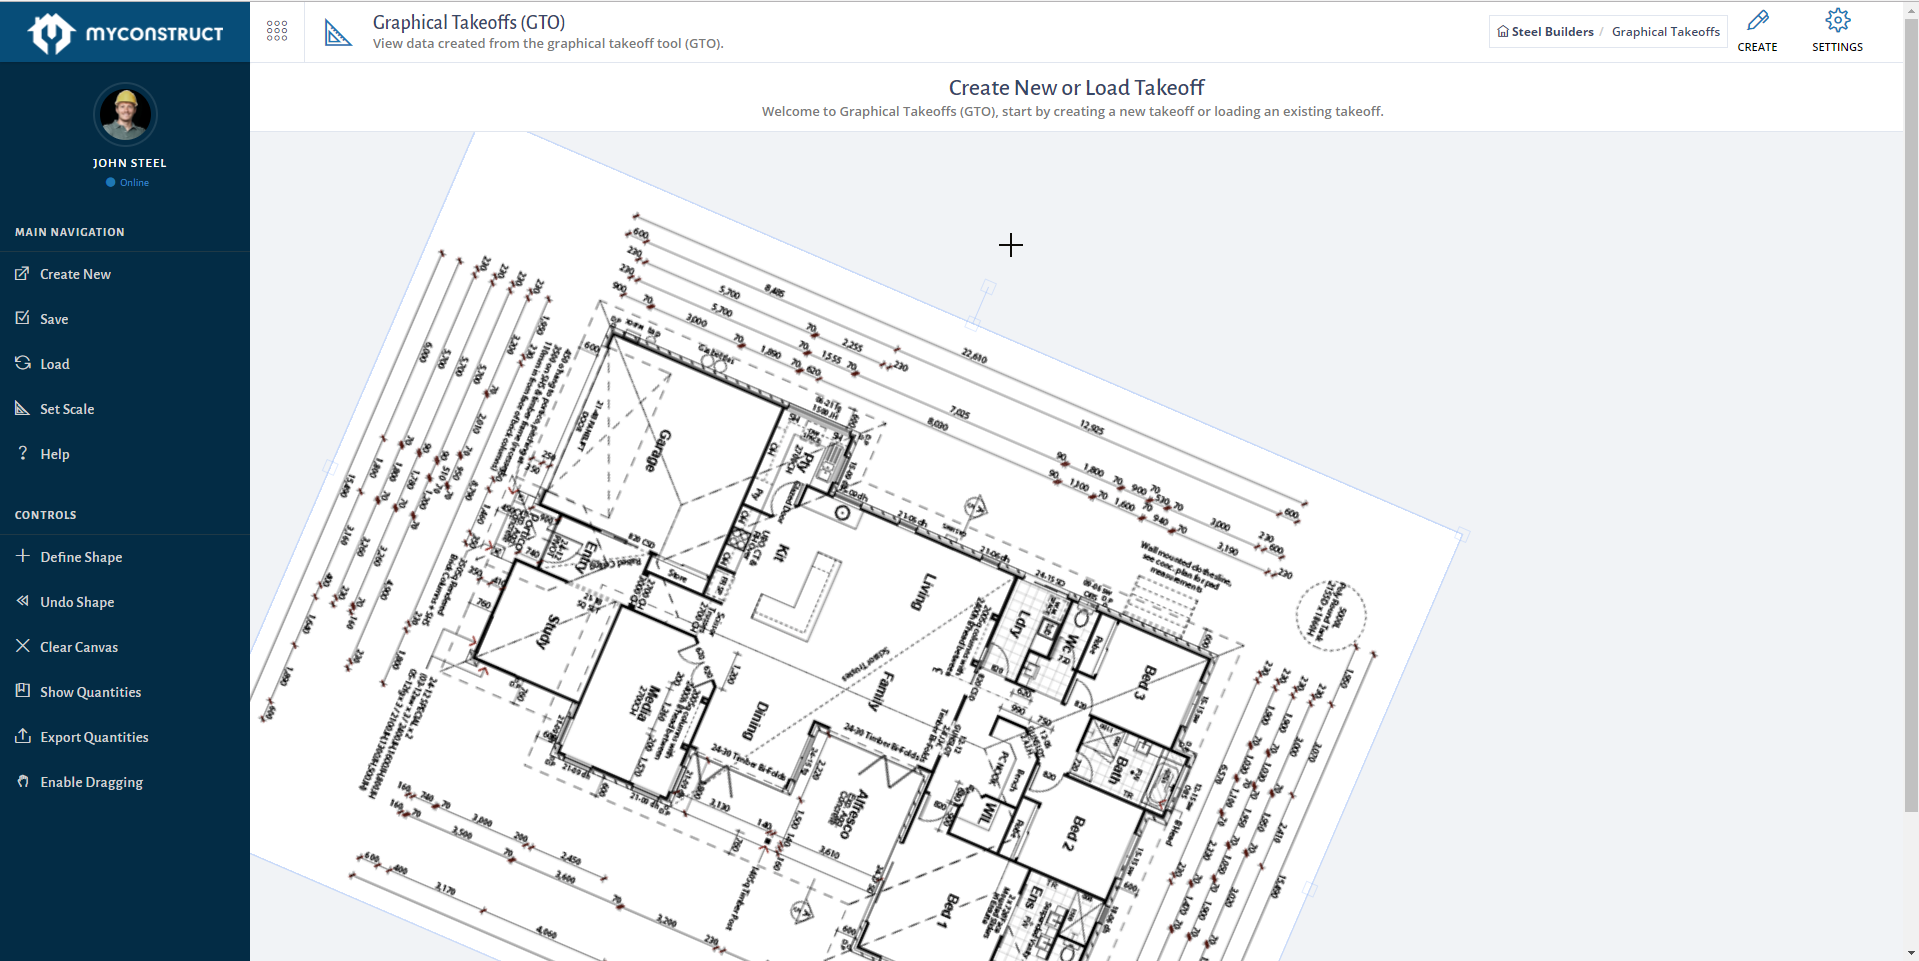
This takes us to the GTO tool in a new window / tab.
The page will load up blank with a brief intro at the top, now is a good time to click on "Help" and check out the video, otherwise let's continue on by selecting "Create new" from the left menu.
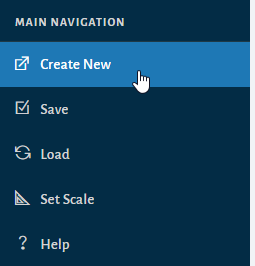
Now we have to setup a new Takeoff by filling out the details
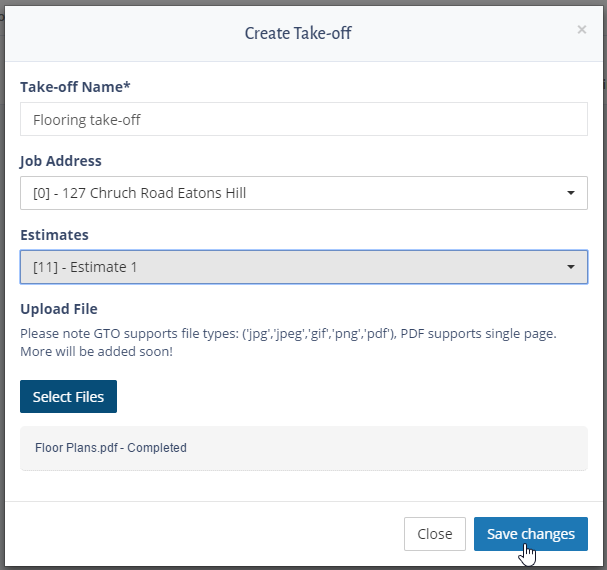
Set the takeoff name, which is just a vanity name for yourself to keep track of the takeoff as there may be a few different takeoffs or different plans etc.
Next select the job address, this will then filter down the Estimates option below it.
In the Estimates drop-down, find the Estimate you are working on.
Finally click on "Select Files" and upload your floor plan, then click "Save Changes".
Your floor plan will now load up and allow you to resize / drag it into position via the small blue boxes in each corner
Simply click (and hold) to drag the plan into position and then click (and hold) the corner boxes to resize the plan to suit your screen.
You can also rotate the plans by clicking on the extended box on the top side of the plan and rotating by clicking (and hold) then move your mouse side to side.
Now the the plan is loaded up and ready, we just have to set the scale.
Before setting the scale, take a moment to check the plan for a known measurement, the easy option is to find a written dimension and take note of that, otherwise you can use something like a garage door opening or standard door opening for this known measurement.
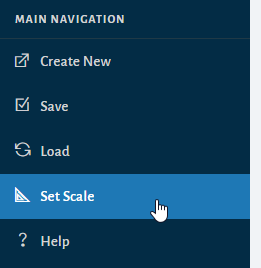
Now click on "Set Scale" from the left menu and fill add in the known measurement below
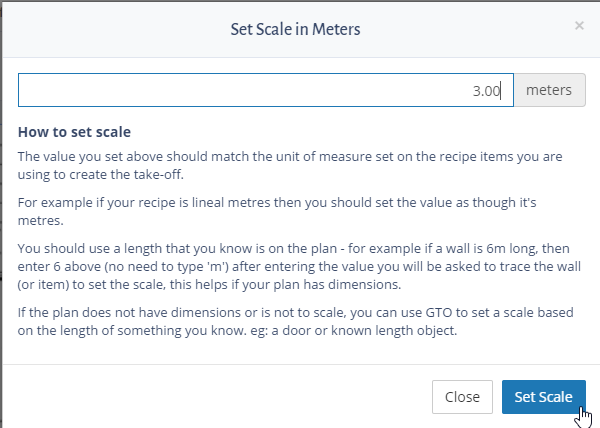
In this example, I'm using a 3m known length which I'm going to measure off one of my dimension lines on the plan itself.
Now you've entered the known measurement, we are going to click on "Set Scale" and then actually draw the line over our known length by simply clicking (once) to start and then again (once) to finish the line.
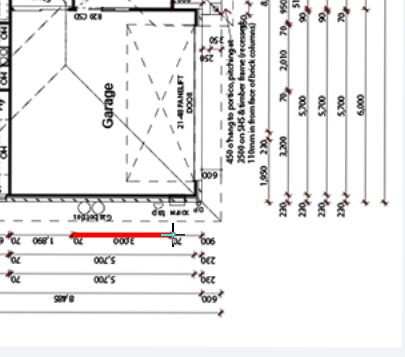
Once you have set the scale, a popup message will show up say "Scale has been set, you may now start measuring" - click OK and let's get started.
For our example we'll be working out the carpet, so let's start by clicking "Define Shape" on the left menu.
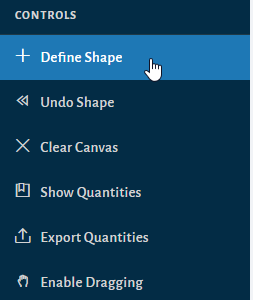
Now you just need to set up the shape itself (being the item we want to measure)
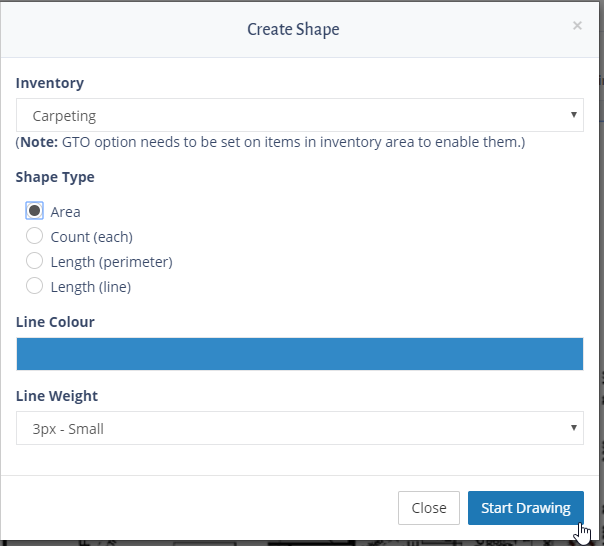
Now I'm going to select "Carpeting" from my Inventory (which shows based on the GTO option in the Inventory / Recipe itself), the type will be "Area" as we are measuring the area and then finally we'll choose the blue colour and standard line weight for vanity.
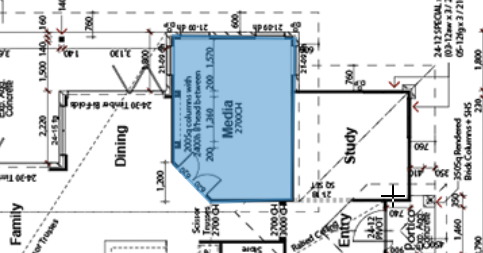
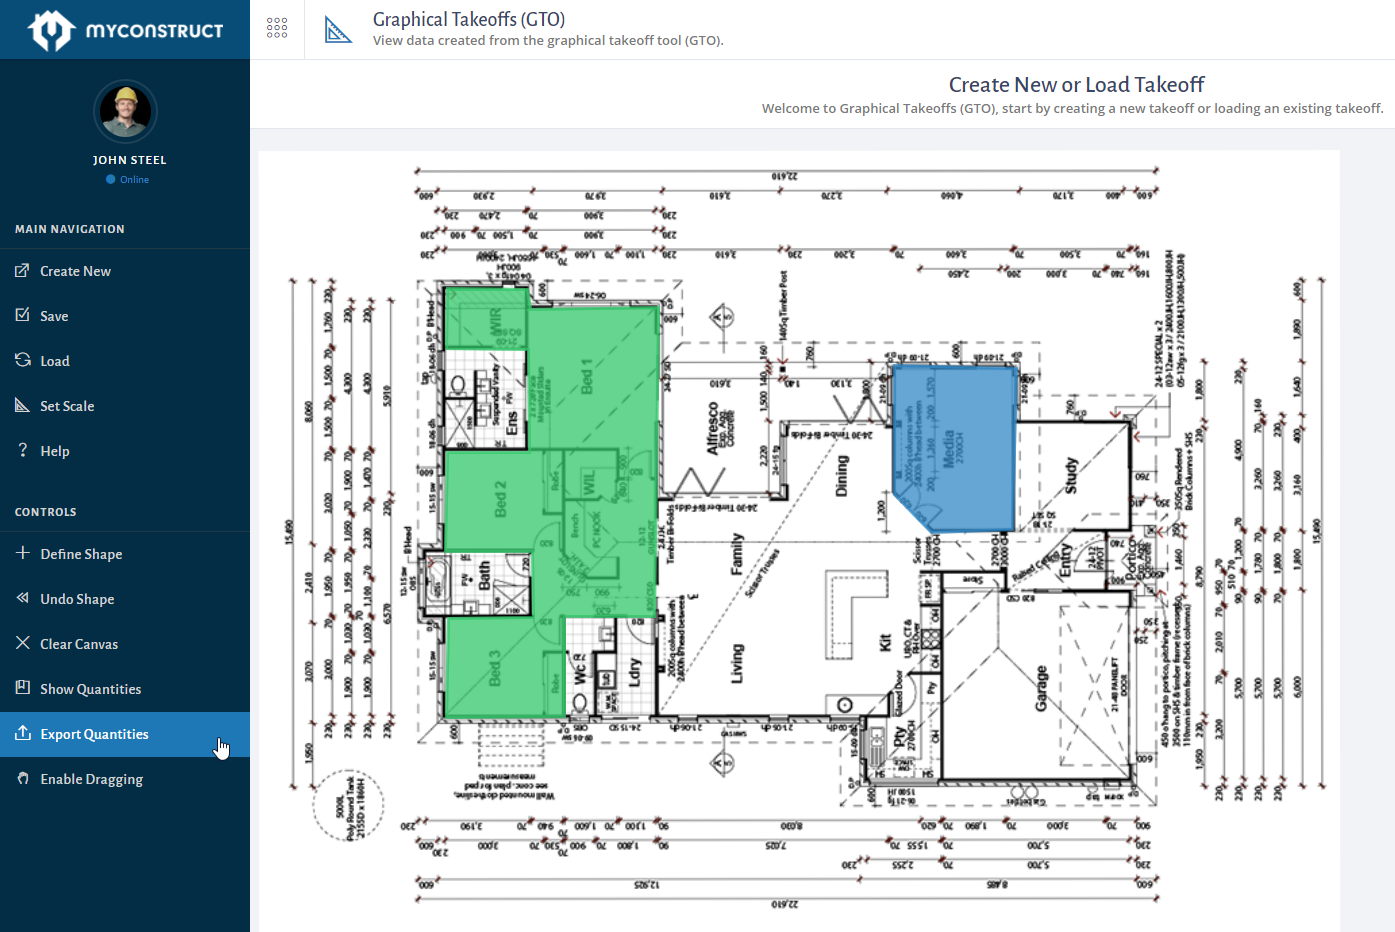
Now we are all good to start tracing the floor plan to work out our area of carpet, starting with the "Media" room on the plan below.
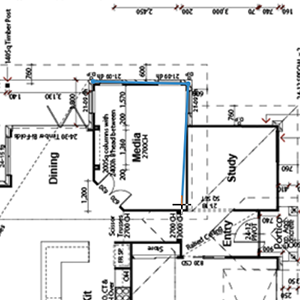
Simply start by clicking the first corner of the room (once), then mouse over to the next corner (you will see the line move and straighten up) and continue until you've completed the area and back to the first point. When you reach the starting point, simply double click (on the starting point / close to) and the shape will be complete!
Now all we need to do is repeat the step from click the "Define Shape" option until our desired rooms are all measured out.
Once all the measurements are done, we can just click on the "Show Quantities" option and export each shape one by one via the export button on each item.
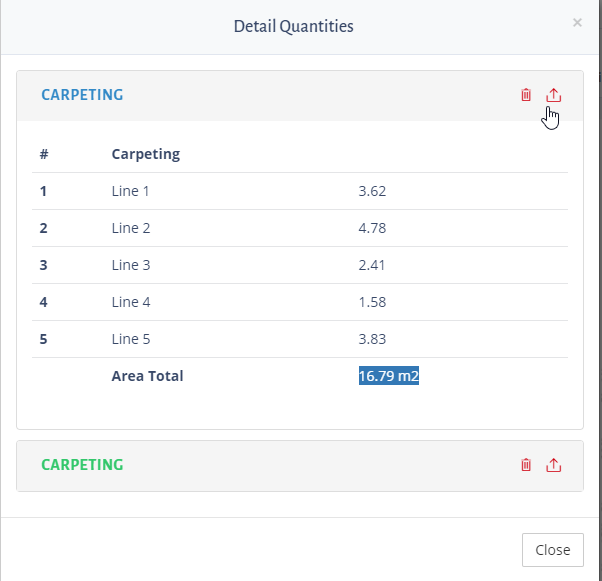
Or if you'd like to export them all in one go, you can simply select the "Export Quantities".
The next prompt simply asks for the Estimate to send the takeoff quantities to, note my example I've measured 16.79m2.
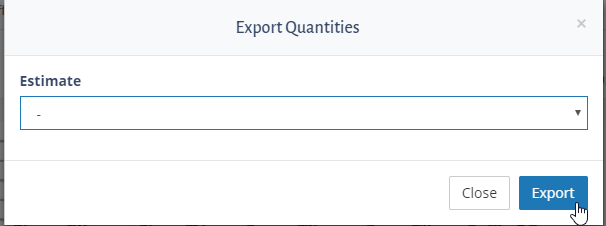
Now just select the Estimate and you'll see the quantities show in the estimate builder area.
This completes the example, just remember the best use for the GTO is for using complex recipes to help speed up you takeoffs by working out many items at once rather than just individual items.
You can read more on Recipes here.
Or



Comments
0 comments
Article is closed for comments.