[Note - this feature is only available in Pro subscription]
Getting started with Inventory setup
The first step to getting started is to create a ‘Type of Work’ in MyConstruct via the main menu, select ‘Estimates’ then the sub-menu ‘Manage Cost Centres’.
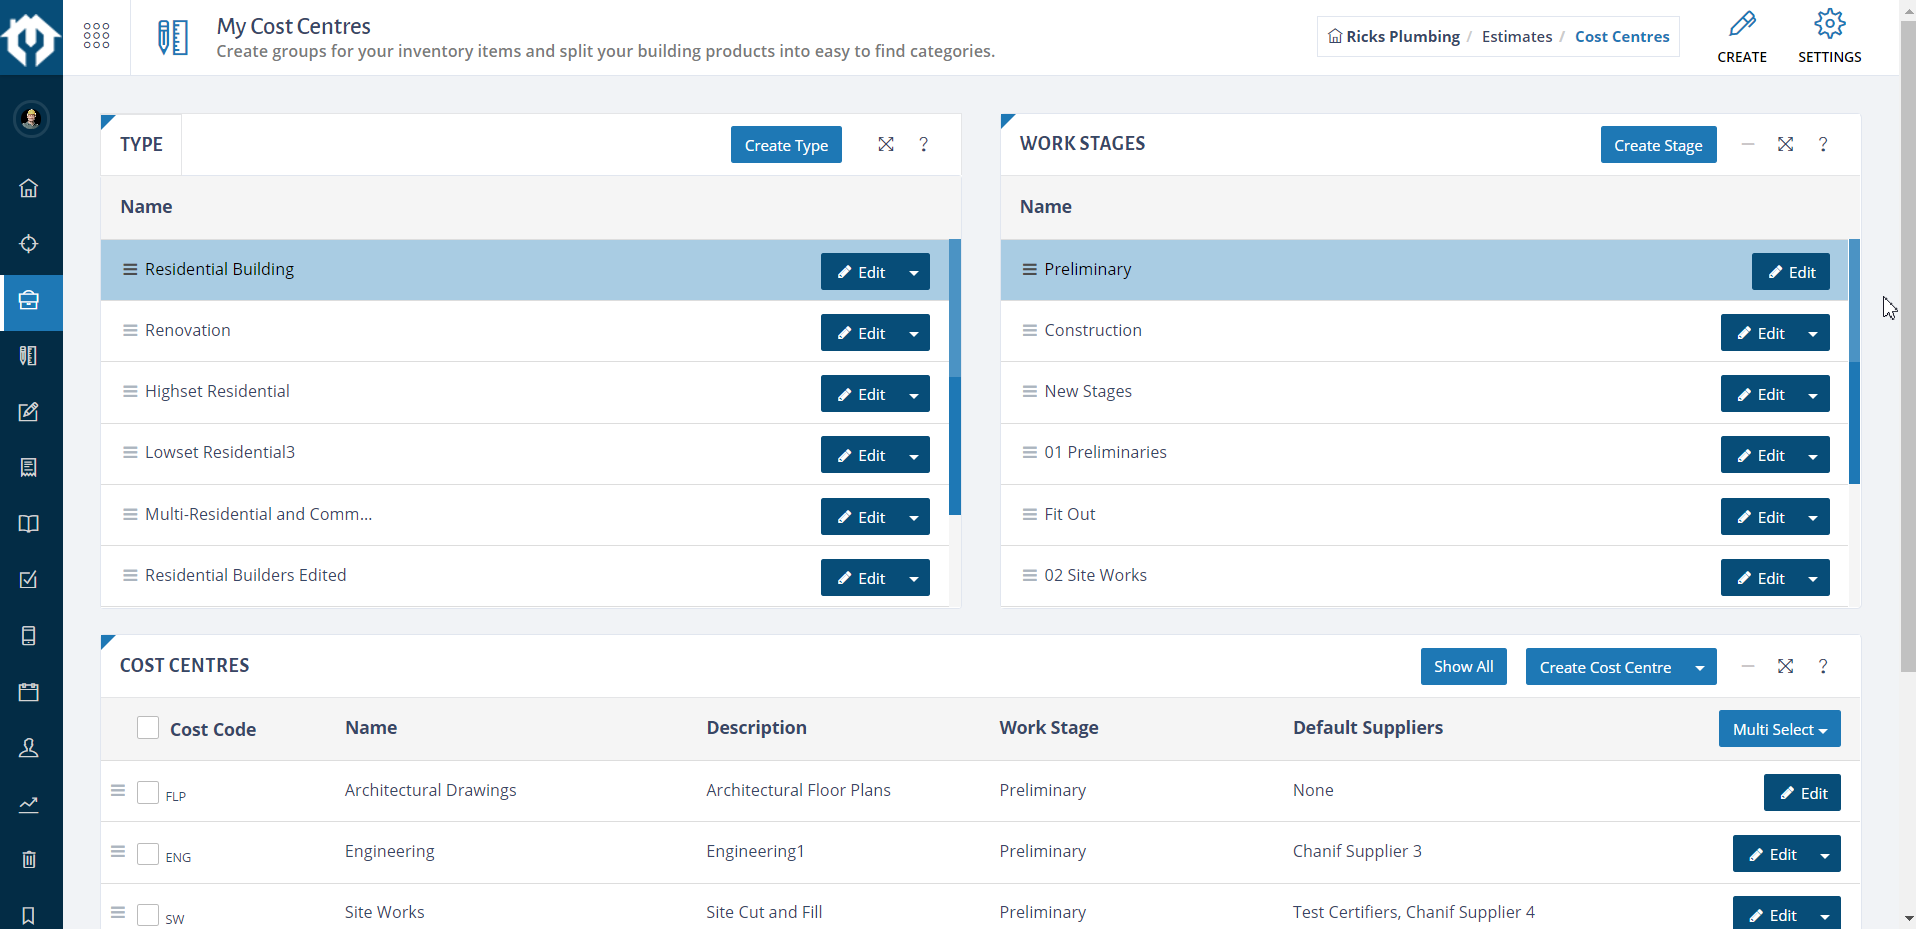
At the top of this page is where you can create the ‘Type of Work’ by selecting the button, now we just have to name the Type of Work something descriptive for it’s contents, for example “Residential Building”, you should start with a broad scope for your first type of work because you want to import as much as possible into this first category and then later on you can simply assign the same items to more defined types of work. For instance, if we create an overall Residential Building Type of Work, in future I can simply create others such as “Renovation” or “Single Storey” and “Double Storey” etc – then all I need to do is assign the items from my Residential Building category to all my other Types of Work and thus save a lot of time and not need to re-import any data.
The idea is that your Inventory items will be single entry and a single location to keep them up to date, but they can be assigned to many Cost Centres and Types of Work to help speed up estimating.
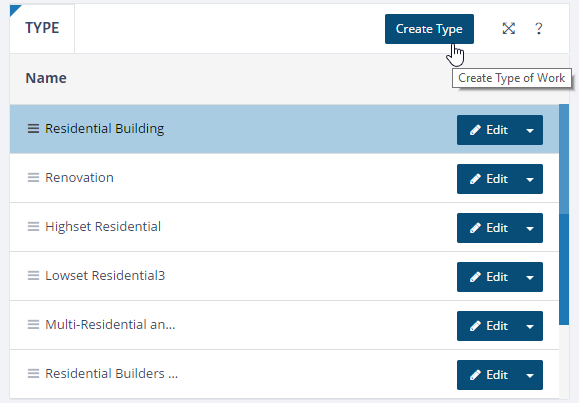
Now we have created our main Type of Work, we must create at least 1 Work stage before we can start adding in Cost Centres.
Work stages are used to breakdown groups of Cost Centres, for instance I may have a Work stage called “Site Works” and within that my Cost Centres would be things like “Soil test”, “Setout survey”. “Site cut”, “Machine Hire” etc.
These Work stages can be used to group my costing later when I generate a Bill of Quantities or they can be used to breakdown my quotes for a client and to generate Purchase Orders by Work stage.
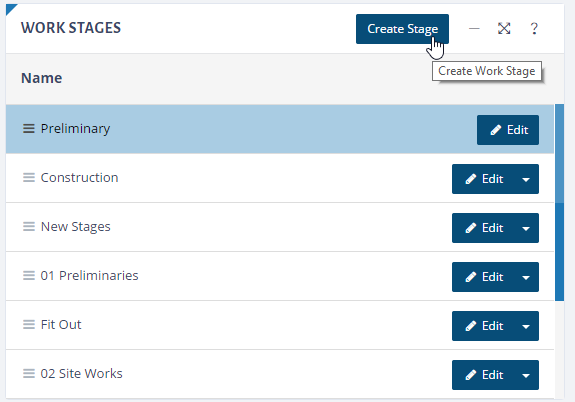
Now you’ve created a Work stage, you simply have to create some Cost Centres in the bottom section of the screen.
Cost Centres are like a folder, they are a way to categorize your inventory items and the overall layout of your Estimate and Bill of Quantities.
In this example I’m going to add all of the Cost Centres needed for a residential house build.

Learn more about Types of Work and Cost Centres
Once all of your Cost Centres are created, we can start adding Inventory items within each Cost Centre and set our pricing, unit of measure and details for default settings when Estimating or Quoting.
Details on setting up Inventory
Later once you’ve entered all the Inventory you can create additional Types of Work and then assign the Cost Centres and Inventory we have just created to the new Types of Work to speed things up! You will find that Types of Work can contain the same items, for instance a “Single Storey” Type of work will have the same Cost Centres as a “Double Storey” Type of Work with the exceptions of Cost Centres such as Staircases, Void protection, Handrails etc etc.
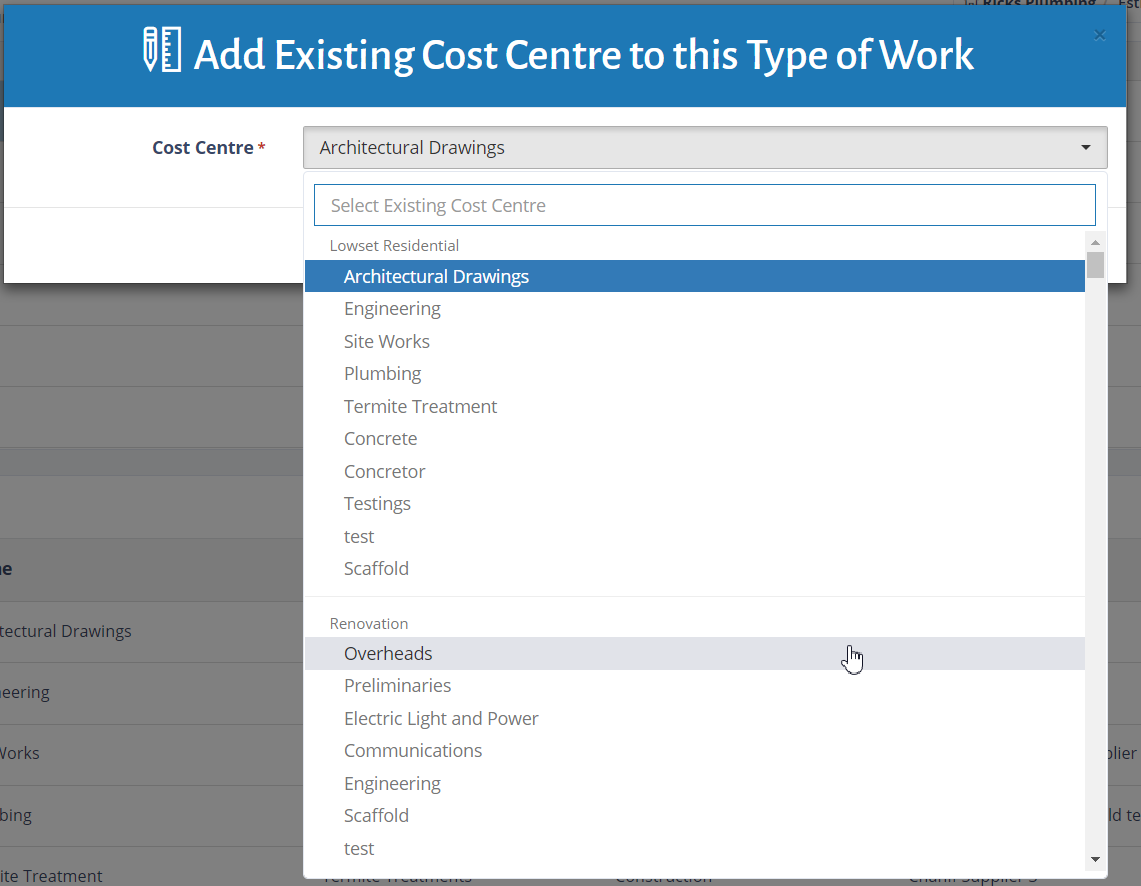
Instead of creating duplicate Cost Centres in each Type of Work, you can simply assign existing Cost Centres using the drop-down below:

After clicking on the drop-down and selecting "Add Existing" you will be able to choose Cost Centres from different Types of Work and assign them to the current one you're working on. Example below:
Importing Inventory:
The most time-consuming process in setting up a new estimating system is always the Inventory and Cost Centre creation.
Luckily within MyConstruct we have some easy to use import tools that will accept your existing data as a CSV file (excel file) which you can create by exporting from an existing system or most suppliers will be able to send you their inventory in this file format as standard.
Apple users note: For best results when saving your CSV file, choose the "CSV (MS-Dos)" option from the filetype dropdown. There's a known bug that if you save as the default Mac CSV the first line of your CSV doesn't always import correctly.
The best way to start is to prepare your excel files and create one for each Cost Centre, ie create a new excel file for all of your Tapware and then name it Tapware.csv, this way you can import Inventory by Cost Centre. If you do not have a lot of items, you can just import one big CSV file and then assign the items to Cost Centres within the import wizard.

Now that you have your CSV file ready, it’s time to simply navigate to the Inventory import tool.
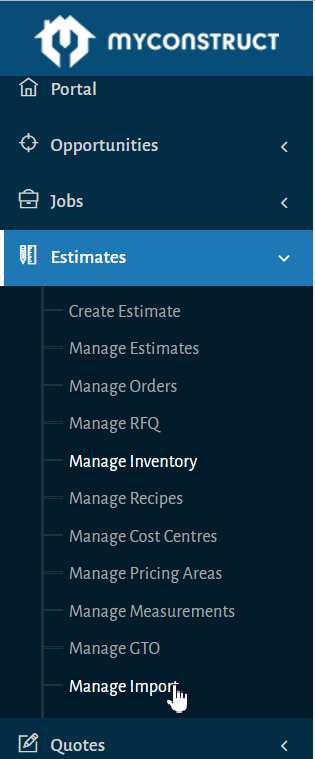
From the main menu, select “Estimates” then “Manage Inventory” and look for the import icon here:

Or from within the "Estimate" menu in the "Manage Import" section:
The import tool has a very easy to use wizard, you just simply select your CSV file and follow the steps to import that data.
Check out the video on the CSV Import Tool
We understand that this task can be quite painstaking, but if you think of it as a bit of work now that will save you a lot of time in future, kind of like moving house, this is the best time to strip out all those old Inventory items that you no longer use or the pricing is out dated. You will save a lot of time when it comes to creating Estimates and having all your updated items and pricing without the bloat of outdated or discontinued items.
If you need some example data to get started as a reference or if you are a student and require examples for a project please check out our Indicative Trade Prices that make a great example inventory to get you started.

Comments
0 comments
Article is closed for comments.